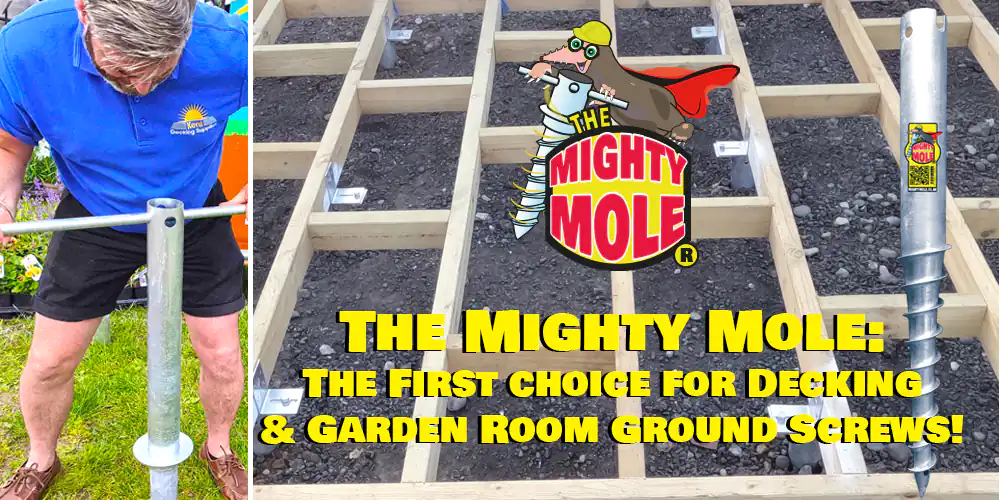
STOP the ROT from the BOTTOM & raise your decking subframe with The Mighty Mole Ground Screw!
Our Hot Dipped Galvanised Ground Screws, Hats, extensions and tools are specifically manufactured to easily raise & secure your decking & garden room subframes. Simple for the home installer to use, yet strong enough for any professional installation.
Meet the Mighty Mole!
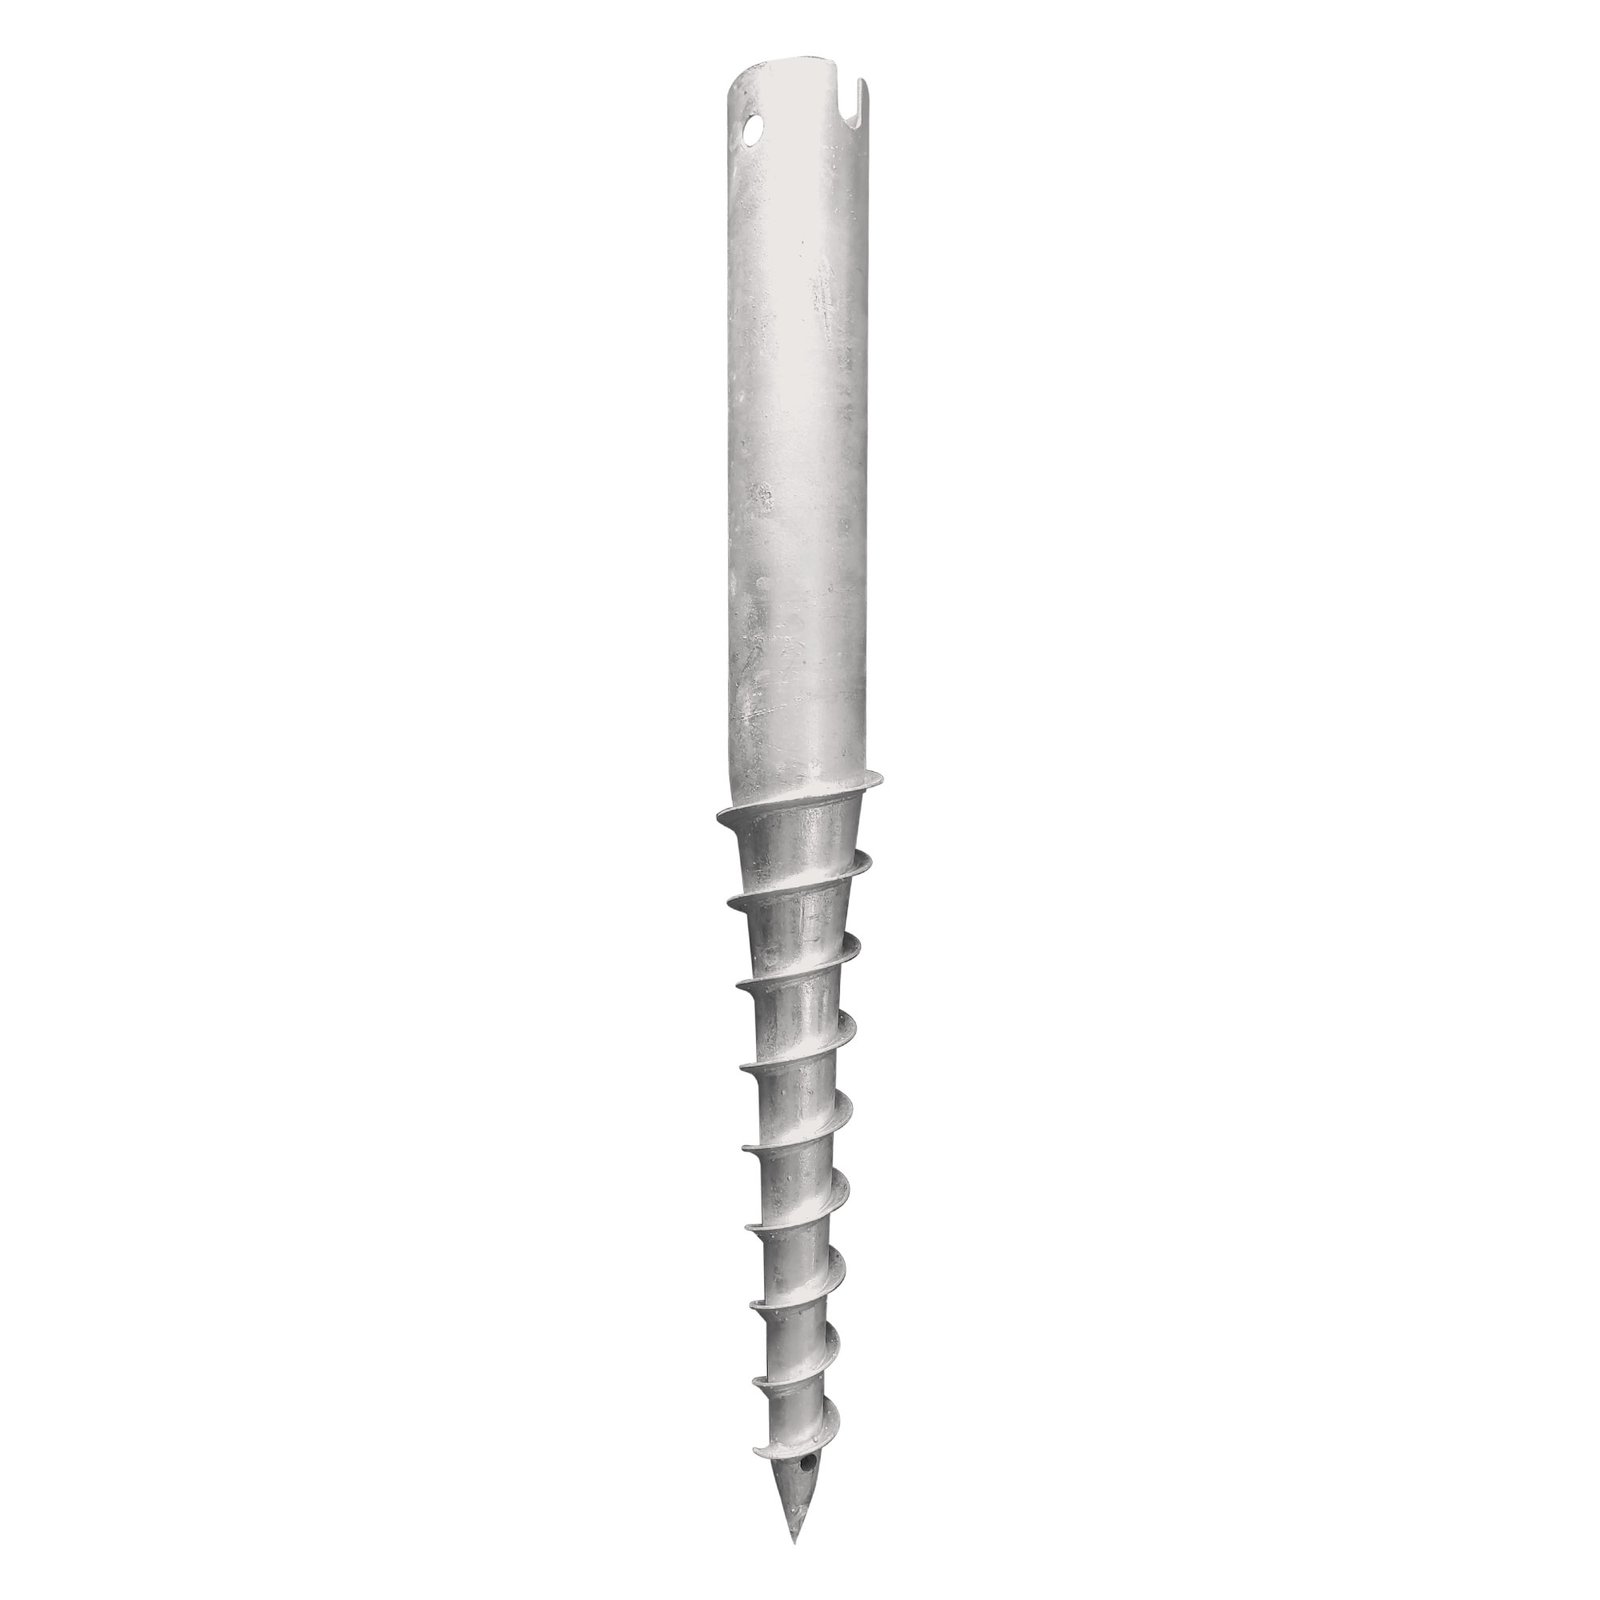
The Mighty Mole is a fully Hot Dipped Galvanised Ground Screw with an outside diameter of 65 mm, length of 700 mm and capable of carrying an average load capacity of 4 KN (0.4 Tonne). Simply screw into the ground every 1.2 to 1.5 metres to give your decking subframe a dry, strong, level surface to sit on.
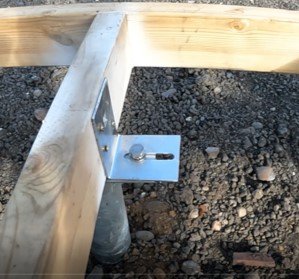
Our Mighty Mole Hat Set includes 1 x Hot Dipped Galvanised Steel Hat, 1 X L Brace, 2 x Bolts & 4 X wood screws. Simply slot & secure on top of The Mighty Moles. Designed for adaptability so even if The Mighty Mole is not exactly positioned to centre the joists, you can spin the Hat and slide the L Brace so that you can still firmly secure your subframe joists to your Mighty Mole.


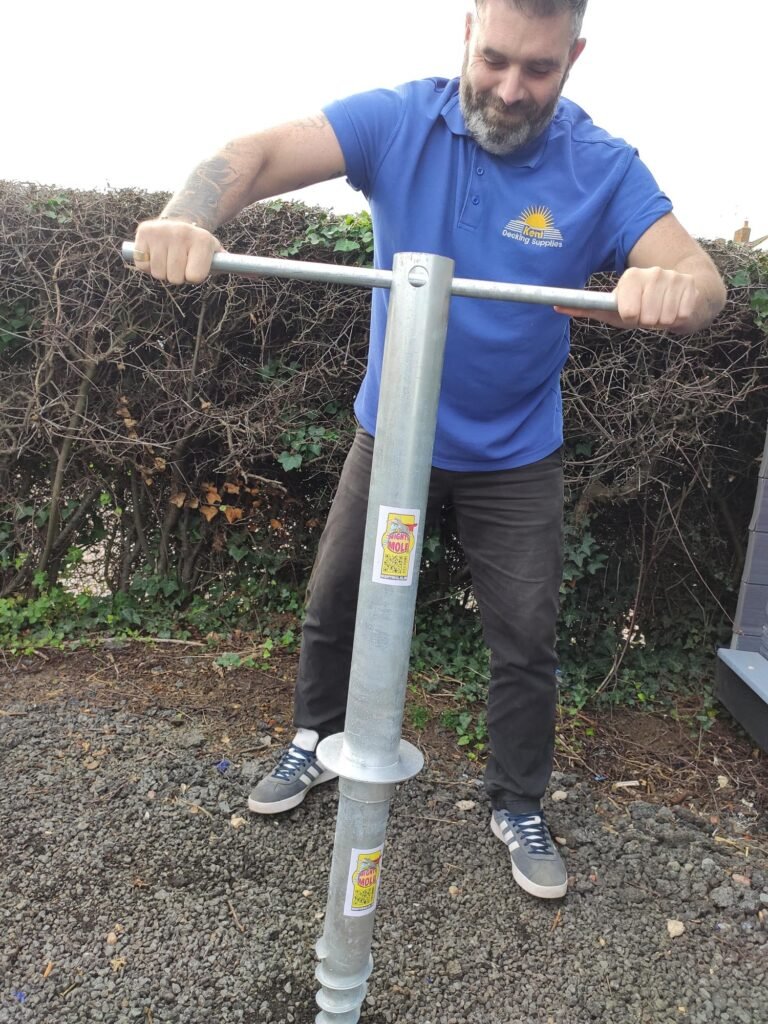
Our Mighty Mole Tool is fully Galvanised, height adjustable and has an integrated levelling shelf. Making your installation simple to smoothly drive your Mighty Moles in to the ground to the level you require.
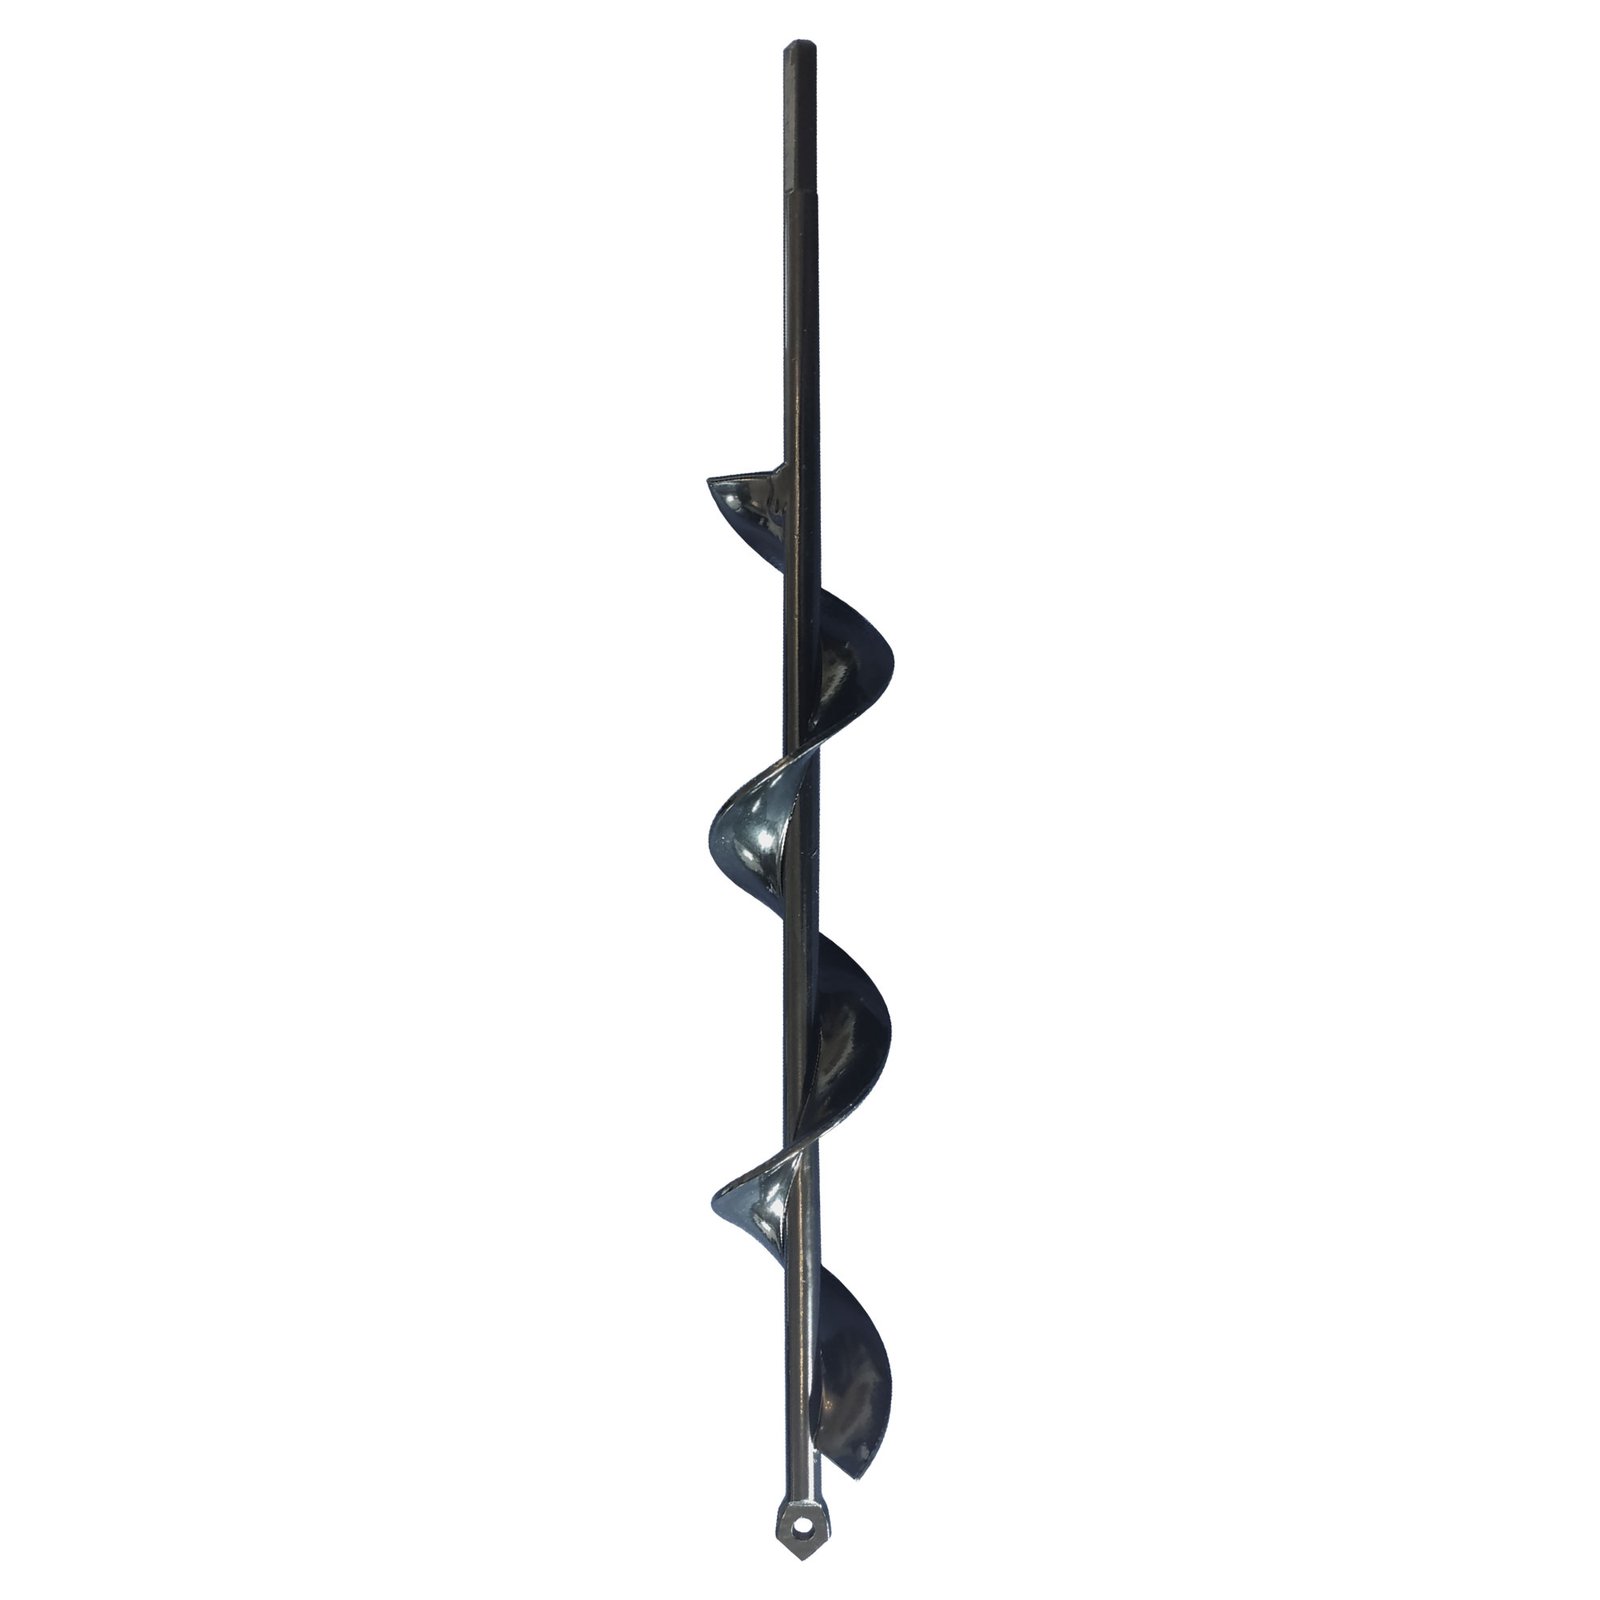
The Mighty Mole Borer makes light work of installing Mighty Mole in any ground type. Our 45 mm wide by 300 mm long Borer slots into your drill or driver chuck to make a “starter” while not reducing the structural integrity of your Ground Screws.
Our new Hot Dipped Galvanised Mighty Mole Extension Adds extra height onto your Mighty Mole Ground Screw when you need a little more clearence. These extensions can be used to increase your level in 150 mm increments. Simply slot onto your Mighty Mole or another extensions and secure the included bolts.
Ordering
UK Ground Screw Supplies
You will need 1X Mighty Mole Tool (to drive your screw into the ground), 1X Mighty Mole Borer (this is handy in hard ground as a way to start you off) & Enough Ground Screws & Hats for them to support the size and weight of your Decking or Garden Room. For an average deck you have ground screws which can be spaced 1.2 to 1.5 metres apart in relatively solid ground so you do not need as many as you would with shorter and slimmer ground screws. Please note you will need more where you have more weight ie under a hot tub or for Garden Rooms.
Additional Benefits
As well as time, sweat and cost , replacing timber posts with The Mighty Mole makes your foundation
- specifically designed for Decking and Garden Rooms
- Rot free (Timber, even treated and in concrete will still rot at ground level)
- More environmentally friendly (cement production is harmful to the environment and cement in the ground effects the soil around it and cannot be reused or recycled)
- Easily removable & reusable ( you can easily unscrew The Mighty Mole with the tool and re-use it elsewhere)
- Permanent or temporary
- installation at any time of the year
Traditionally, to raise your decking subframe off the ground you would saw up 4×4 timber posts, dig holes, hire a skip to get rid of the dirt , mix and pour cement or post crete into the bottom of holes and then around the posts, keep checking your posts are stood upright and at the right levels,wait for the mix to go off and then very likely you would need to saw off the tops of some of the posts, then you would need to paint tar where the post touches the ground to try and prevent rotting
Using The Mighty Mole, Tool, & Hat eliminates all of the above SIMPLEY
- Screw into the ground to level as required
- slot Hats on top
- add subframe
- secure to joists
Install Guide
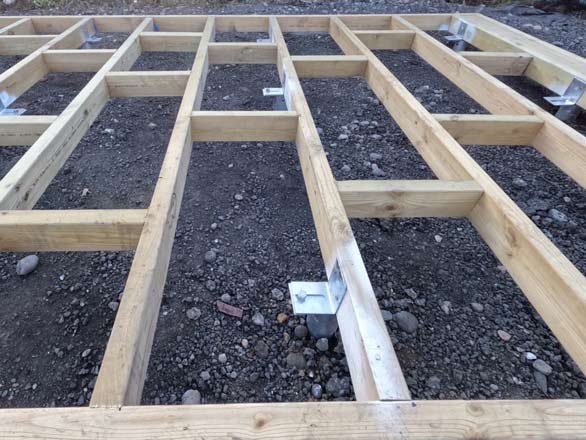
Remember to plan your subframe so that the Mighty Moles are back from the outer edges by 50 to 100 mm around the outer perimeter.
The reason for this : your Hats are circular for adaptability and so you will have more “play” when securing your subframe ; it is more aesthetically pleasing to have a “floating” deck or Garden Room; if you plan to add fascia boards /skirting you have room to add frame work to fix it to
Mighty Mole Ground Screw Install guide & tips


- Check the ground for any live cables such as electricity and gas and drain pipes- typically these will be 300 to 600 mm underground. Your Mighty Moles will screw in deeper than this so it is important you check before you begin installation.
- Mark out where your Mighty Moles will be screwed in- as long as you are building a secure, strong subframe we advise you install them every 1.2 To 1.5 metres but if you are planning on a hot tub, add a few more where it will be just as an added measure. For subframes for Garden Rooms we recommend every metre For harder ground such as clay you may want to also make pilot holes for ease of installation. You could use a long drill bit 25 mm wide or a Starter Borer that will create a “starter”. Please note if you use a Starter Borer do not use one more that 45 mm wide and do not go deeper than 300 mm with this.
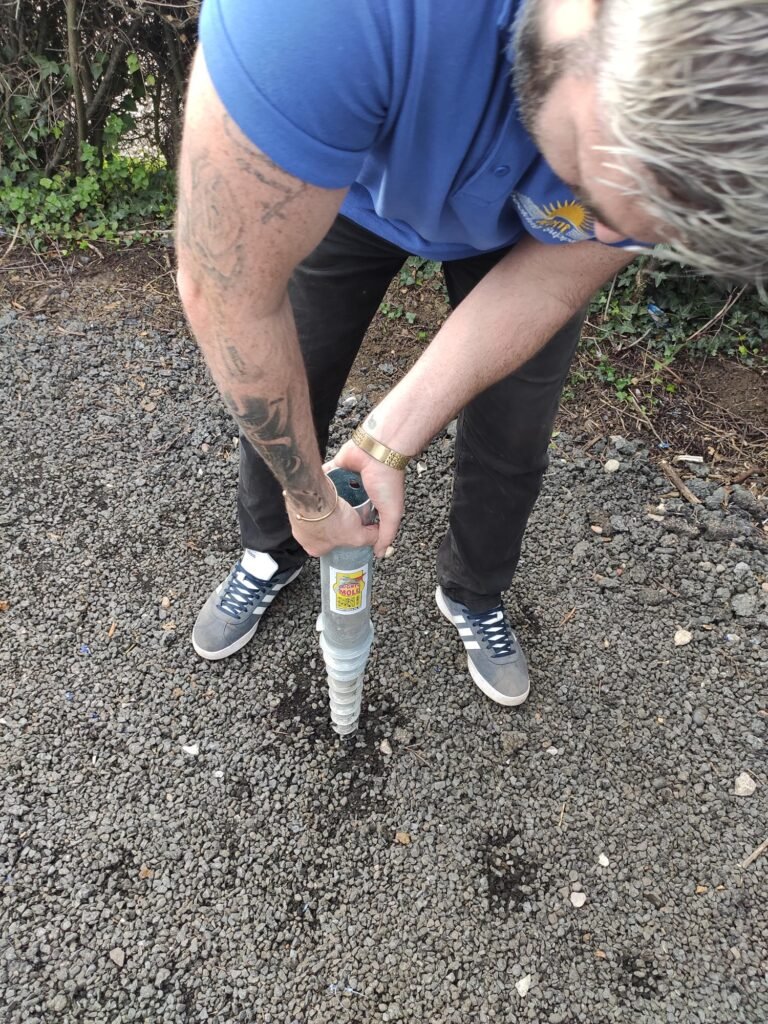
- Screw to start your Mighty Mole-clockwise into the ground by hand initially -you can use your eyes or a magnetic level so that it screws into the ground straight.
- Slot the Tool on top once it’s too hard to turn by hand and turn using the bar. On hard ground its handy having one person at each end to walk round in a circle.
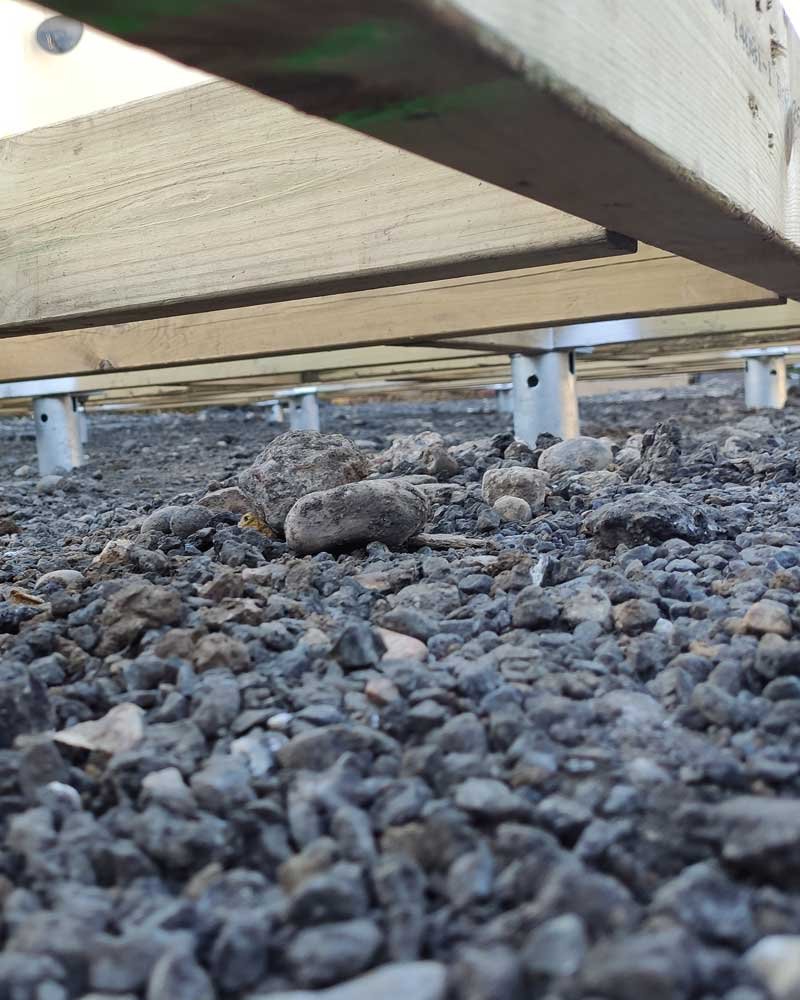
- Screw down to above the desired height and then install the others to around the same height. Choose one screw to use to make the exact height required and then use a level to make the other ground screws the same height, or if you are allowing for water drainage, level accordingly. Make sure the top of the head screws are around a minimum of 50 mm above the ground to allow for air flow underneath.
- Slot you’re Hats on top of your Mighty Moles and lay your joists/frame on and across the caps so you are happy with the positioning. Use your adaptable L Brace and turn your Hat as needed to find the best positioning to screw your bolts into the captive nuts. Use wood screws through the holes of the vertical part of the L Brace into the joist and tighten the bolts.
You now have a secure/levelled subframe to install your decking/garden room/shed/sales office.